Email List Verification: A Step-by-Step Guide to Cleaning Your List Properly
Email list verification is not complicated, but doing it correctly, acting on the right results in the right order, makes the difference between a clean list and one that still has problems.
Email list verification is the process of checking every address on your contact list and identifying which ones are valid, which should be removed, and which should be treated with caution. It is one of the most direct ways to improve deliverability, reduce bounce rates, and protect the sender reputation your entire email program depends on.
The process is straightforward, but acting on the results correctly is what makes the difference between a list that stays clean and one that keeps causing problems.
Why Email List Verification Is Necessary
Lists decay continuously. People leave jobs and lose their work email addresses. They abandon personal accounts and move to new providers. They use disposable emails at signup and let them expire. Each of these scenarios leaves dead or invalid addresses sitting in your database until you mail them and the bounces appear.
Industry estimates consistently show that somewhere between 20 and 30 percent of any email list becomes undeliverable within a year of collection. Without regular verification, that decay accumulates silently until a campaign send reveals it in the form of a bounce rate spike that can take weeks of careful sending to recover from.
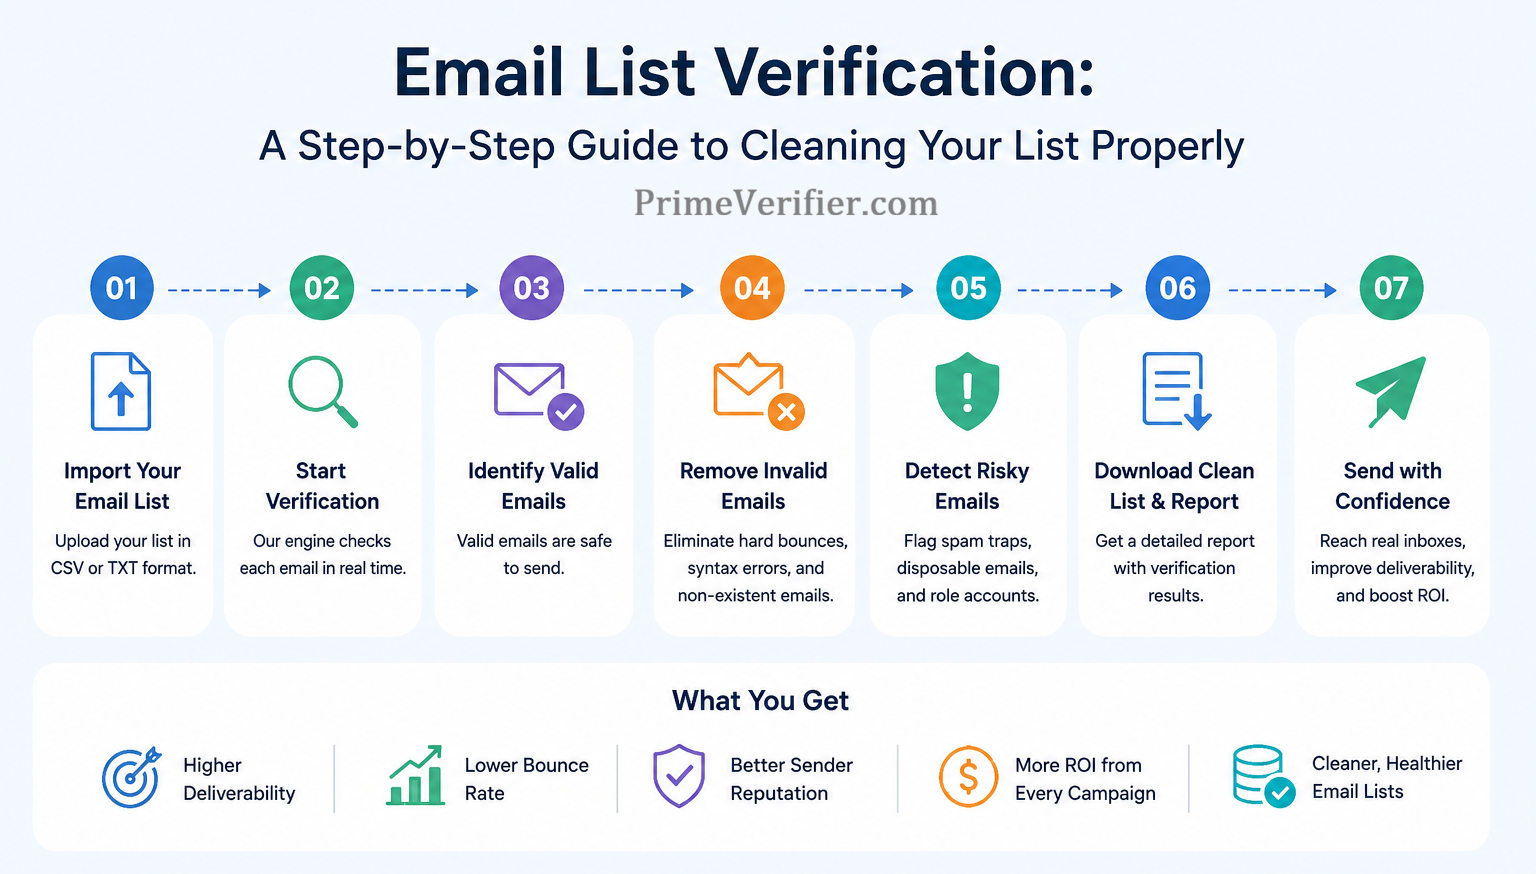
Step 1: Export Your List
The first step is to get your list into a format the verification tool can process. Most email platforms, CRMs, and databases support exporting contacts as a CSV file, which is the standard format for bulk verification.
Decide which segment you are verifying. For most routine cleanups, you want to verify your full active contact list. For a campaign-specific cleanup, you want the list you are planning to send to. For a new import, you want the file before it enters your system.
Step 2: Upload to a Verification Tool
Upload your exported CSV to a bulk email verification platform. Prime Verifier accepts standard CSV and spreadsheet formats and processes files of any size.
Once uploaded, the verification process starts automatically. The tool checks every address in your list through its full verification sequence: syntax validation, domain and mail record checks, mailbox-level verification, and risk scoring for disposable domains, spam traps, role-based addresses, and catch-all configurations.
Start your list verification at app.primeverifier.com/register
Step 3: Wait for Results
Processing time depends on list size and the platform. Prime Verifier returns results quickly, typically within a few minutes for small and mid-size lists. Large lists of hundreds of thousands of addresses take longer but are still processed in the same session.
You will receive a notification or the results will be available for download once processing is complete.
Step 4: Download and Review the Results
The results file comes back with your original addresses plus a status column for each one. Standard status categories include valid, invalid, disposable, risky, and catch-all with a confidence score.
Before acting, take a few minutes to review the overall picture. What percentage came back invalid? What percentage are disposable? Are there many catch-all addresses, which might indicate a heavily B2B list? Understanding the distribution helps you make good decisions about each category.
Step 5: Act on the Results
This is the step most people rush, and it is the most important one.
Remove all invalid addresses from your send list and your database. These addresses generate hard bounces and damage your sender reputation. There is no case where keeping them is beneficial.
Remove all disposable addresses. These are either already expired or will expire soon. They provide no value and eventually bounce.
For risky addresses, review the specific flags and make a judgment call. Some risky addresses are worth mailing in certain contexts. Others should be suppressed. The risk details the verifier provides, whether the flag is a spam trap pattern, a role address, or a specific domain risk, help you decide.
For catch-all addresses with high confidence scores, include them in your send. For those with low scores, either suppress them or test them in a small batch before including them in a major campaign.
Keep your verified valid addresses as your clean sending base.
Step 6: Reimport the Clean List
Take your cleaned, verified list and import it back into your email platform or CRM. If your platform supports contact statuses or tags, consider tagging verified contacts with the verification date so you know when each segment was last checked.
See how Prime Verifier results integrate into your sending workflow at primeverifier.com/#how-it-works
Step 7: Schedule the Next Verification
Verification is most valuable as a habit rather than a one-time event. Set a reminder to repeat the process in 60 to 90 days. Lists decay continuously, and the next cleanup should happen before the next major campaign reveals the problem.
For addresses entering your system through forms, adding Prime Verifier's real-time API to your signup forms means new contacts are verified as they arrive, reducing how much decay accumulates between your scheduled bulk cleanups.
Prime Verifier makes email list verification fast and accurate at 99%+, with all data encrypted and never shared with third parties. Verify every email with confidence at PrimeVerifier.com.